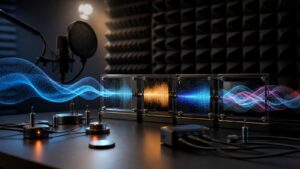
Audio & Speech Signals

Audio & Speech Signals

On Signal Streets, “Audio & Speech Signals” is where everyday sounds turn into stories you can actually see and understand. From your favorite song to a quick voice note, every vibration in the air carries patterns, textures, and clues about what’s happening in the world around you. This sub-category is your friendly jumping-off point into that hidden layer. We’ll break down microphones, waveforms, noise, and speech features in plain language, with plenty of real-life examples and visuals. Whether you’re curious about how voice assistants hear you, why some calls sound crisp and others muddy, or what makes music feel “warm,” you’re in the right place. Explore practical guides, beginner-friendly explainers, and project ideas that help you listen smarter, record cleaner, and decode sound with confidence—no advanced math degree required. You’ll learn how to spot the shape of a clap, a chord, or a spoken word just by reading a graph. Along the way, we’ll connect the dots between audio gear, apps, and the science of sound so every beep, beat, and sentence makes more sense.

Core Signals
1. Sound is simply air vibrating; our ears and microphones turn those vibrations into signals we can record and measure.
2. A waveform is a picture of how loud a sound is over time—like a heart monitor, but for audio.
3. Higher peaks in a waveform usually mean louder moments, while flatter sections mean quieter or silent parts.
4. Pitch is related to how fast the sound waves wiggle; faster waves sound higher, slower waves sound lower.
5. Sampling rate tells you how many “snapshots” of sound are taken every second when audio is recorded.
6. Bit depth helps decide how detailed your recording is, especially in very quiet parts of the audio.
7. Mono audio uses one channel, while stereo uses two channels to create a sense of left and right space.
8. Speech signals are just sound signals that come from the human voice, shaped by our lungs, vocal cords, and mouth.
9. Background noise is any sound you didn’t really want in your recording, like fans, traffic, or chatter.
10. The basic goal of audio work is simple: keep the good signal strong and the unwanted noise as low as possible.
Data Bursts
1. Most music and podcasts you stream are stored as digital files made from thousands of samples per second.
2. Common audio sample rates like 44.1 kHz and 48 kHz are high enough to capture the range of human hearing.
3. MP3, AAC, and similar formats shrink file size by throwing away parts of the sound we’re less likely to notice.
4. Wave files (WAV) are often larger but keep full quality, which is why they’re popular in studio work.
5. When you see a “kbps” number on a file, it’s describing how much audio data is squeezed into each second.
6. Voice assistants turn your speech into data, then match patterns in that data to words and phrases they recognize.
7. Transcription tools convert speech signals into text by decoding sound patterns into letters and words.
8. Audio compression for streaming balances sound quality with internet speed so you get smooth playback without constant buffering.
9. Simple stats like loudest point, average loudness, and duration already tell you a lot about a recording at a glance.
10. Even short sound clips can contain rich data about mood, environment, and the way someone is speaking.
Tech Toolshed
1. A USB microphone is an easy first step for clearer speech recordings compared to using a built-in laptop mic.
2. Closed-back headphones help you hear details in your audio without letting sound leak into the microphone.
3. Pop filters sit between you and the mic to soften “p” and “b” sounds that can cause sudden bursts of air.
4. Audio interfaces let you plug in better microphones and instruments while giving you volume and monitoring controls.
5. Simple foam or fabric panels on the walls can cut down echo, making speech sound clearer and more focused.
6. Free audio editors let you cut, copy, and clean up recordings without needing advanced studio software.
7. Basic filters like high-pass and noise reduction can instantly make home recordings feel more “studio ready.”
8. A stable mic stand or arm keeps your hands free and helps avoid bumps and handling noise.
9. Level meters in your software show if your signal is too quiet or clipping by turning red at the top.
10. Even a simple smartphone can be a powerful audio tool when paired with a decent external microphone.
Hidden Frequencies
1. A spectrogram is a colorful “heat map” of sound that shows which frequencies are active over time.
2. Low frequencies feel like rumbles and thumps, while high frequencies show up as hiss, sparkle, or sharp edges.
3. Human speech mostly lives in the mid-range, which is why phones focus on those frequencies when sending calls.
4. Equalizers (EQ) boost or cut certain frequency ranges so you can tame harshness or add warmth to a voice.
5. Background hums from fridges or air conditioners often show up as steady lines at specific low frequencies.
6. Sibilance—the sharp “s” sound—usually lives in a narrow high-frequency band that de-essers can gently tame.
7. Many “cinematic” sounds are designed by layering multiple recordings across different frequency bands.
8. Some tools can separate a mix into vocals, drums, and instruments based largely on their frequency patterns.
9. Room resonances happen when certain frequencies bounce around and build up, making notes boomier than others.
10. Learning to “read” frequency charts is like learning a new language that describes why sounds feel the way they do.
Waveform Wonders
1. A quick clap shows up as a sharp spike in a waveform, while a long note stretches out like a smooth hill.
2. Zooming out on a waveform lets you see the overall shape of a song or podcast segment at a glance.
3. Spoken phrases create repeating patterns in the waveform, with pauses and breaths forming little gaps.
4. When audio is too loud and clips, the tops of the waveform get flattened, and the sound can feel harsh.
5. Gentle compression can squeeze tall peaks down slightly so quieter details become easier to hear.
6. You can often spot edits or cuts in a track just by noticing sudden changes in the waveform shape.
7. Songs with big dynamic swings show tall and short sections, while heavily “squashed” tracks look more like a block.
8. Waveforms can reveal clicks or pops as tiny, sharp spikes that stand out from smoother curves.
9. Even without sound, comparing waveforms from different takes can help you pick the cleanest recording.
10. Learning to read waveforms is like getting x-ray glasses for your audio, showing structure you can’t hear at first.
Signal Sync FAQ’s
Q: Why do my recordings sound quiet?
A: Your input level may be set too low. Gently raise the mic gain and watch the meters so they stay out of the red.
Q: What’s the easiest way to cut background noise?
A: Record in the quietest room you can, get the mic close to your mouth, and use a simple noise reduction tool if needed.
Q: Do I really need a special microphone for speech?
A: Not always, but a decent USB or podcast-style mic can make voices sound clearer and more natural.
Q: What sample rate should I use?
A: For most speech and online audio, 44.1 kHz or 48 kHz is perfectly fine.
Q: Why does my voice sound different on recordings?
A: You’re hearing yourself without the extra resonances from your own head and chest, so it feels unfamiliar.
Q: How do I stop echo in my room?
A: Add soft materials like rugs, curtains, and cushions, and avoid hard, bare walls when recording.
Q: What’s the difference between mono and stereo for voice?
A: Mono is usually enough for speech; stereo is more about space and positioning, like in music.
Q: Can I fix a distorted recording?
A: Heavy distortion is hard to repair, so it’s better to record a little quieter and avoid clipping.
Q: How loud should my final audio be?
A: Aim for a comfortable level where speech is clear without needing to constantly adjust the volume.
Q: Where should I start if I’m brand new?
A: Begin with one simple project—like cleaning up a voice memo—and explore from there at your own pace.